
Outdoor faucet leakage when turned off can be a concern to most homeowners, and that’s why this post is of great importance. Not only does it waste water but it can result in increased cost of water and even cause damage to the structures within the building. Fortunately, stopping a leak in an exterior faucet is normally not a complicated process and can be performed with only simple equipment needed and some time. In this blog post, we’ll take you through the most frequent reasons why an outdoor faucet is leaking, how to identify it, and how to repair it.
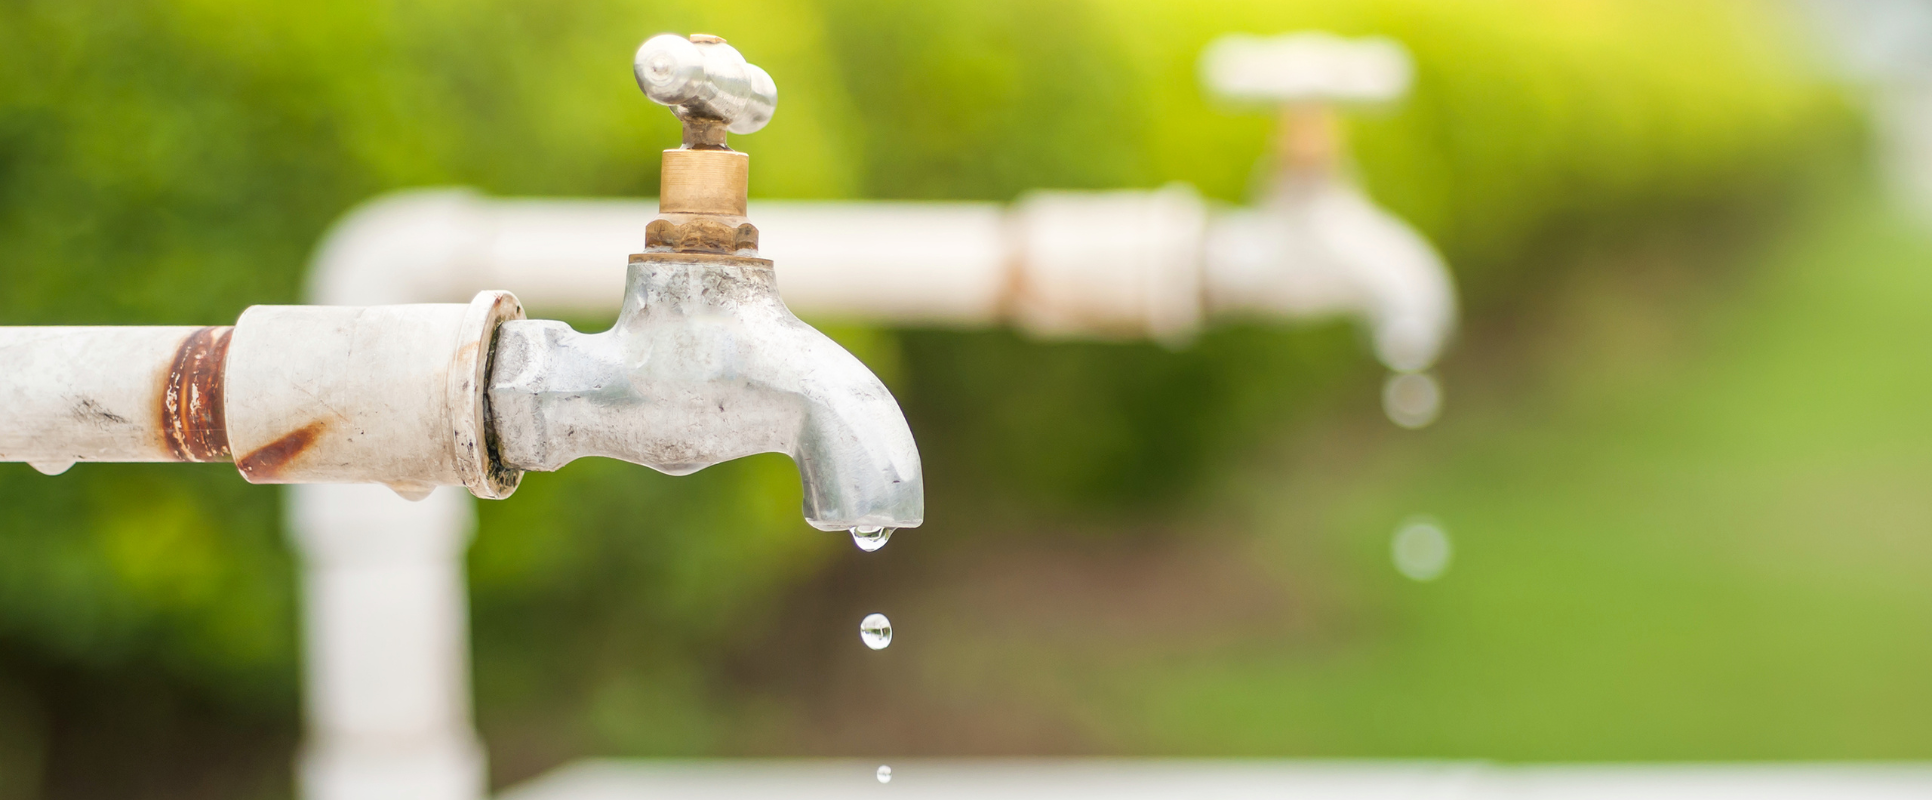
Why Does My Outdoor Faucet Leak When Turned Off?
If you’re still dealing with a dripping or leaking outdoor faucet, you’ll want to know why at first before you proceed to the fix. Here are some of the most common culprits:
- Worn or Damaged Washer: The cause of an outdoor faucet to leak when turned off is as a result of a worn or damaged rubber washer. Washers make a tight fit between the valve seat and the faucet handle. The washer can grow thin with time and can crack, break, or become eroded from normal usage, such that it allows water to seep out even when the faucet is turned off.
- The condition is Corroded or Damaged Valve Seat: The valve seat is the area of the faucet on which the washer tightens to give it a localized seat. If the valve seat is worn or corroded, the washer can’t make a proper seal and stormwater will run through.
- Faulty Stem or Cartridge: This kind of outdoor faucet employs a stem or cartridge to regulate the amount of water to be used. If any of these parts becomes worn or damaged it results in water dripping from the faucet despite the valve probably being shut.
- Frozen Pipes: Cold regions typically are a central problem for the freezing of pipes. When water within the pipe becomes ice it expands and could bring harm to the faucet or the pipe connections and this results in leakages once the ice has melted. If you experience a leakage on your faucet, after a freeze the problem may originate from here.
- Loose Packing Nut: This is usually fixed by the use of a packing nut which is responsible for holding the faucet handle and also forms an annulus around its stem. If it becomes loose over time it can cause water to drip from the faucet when it is turned off.
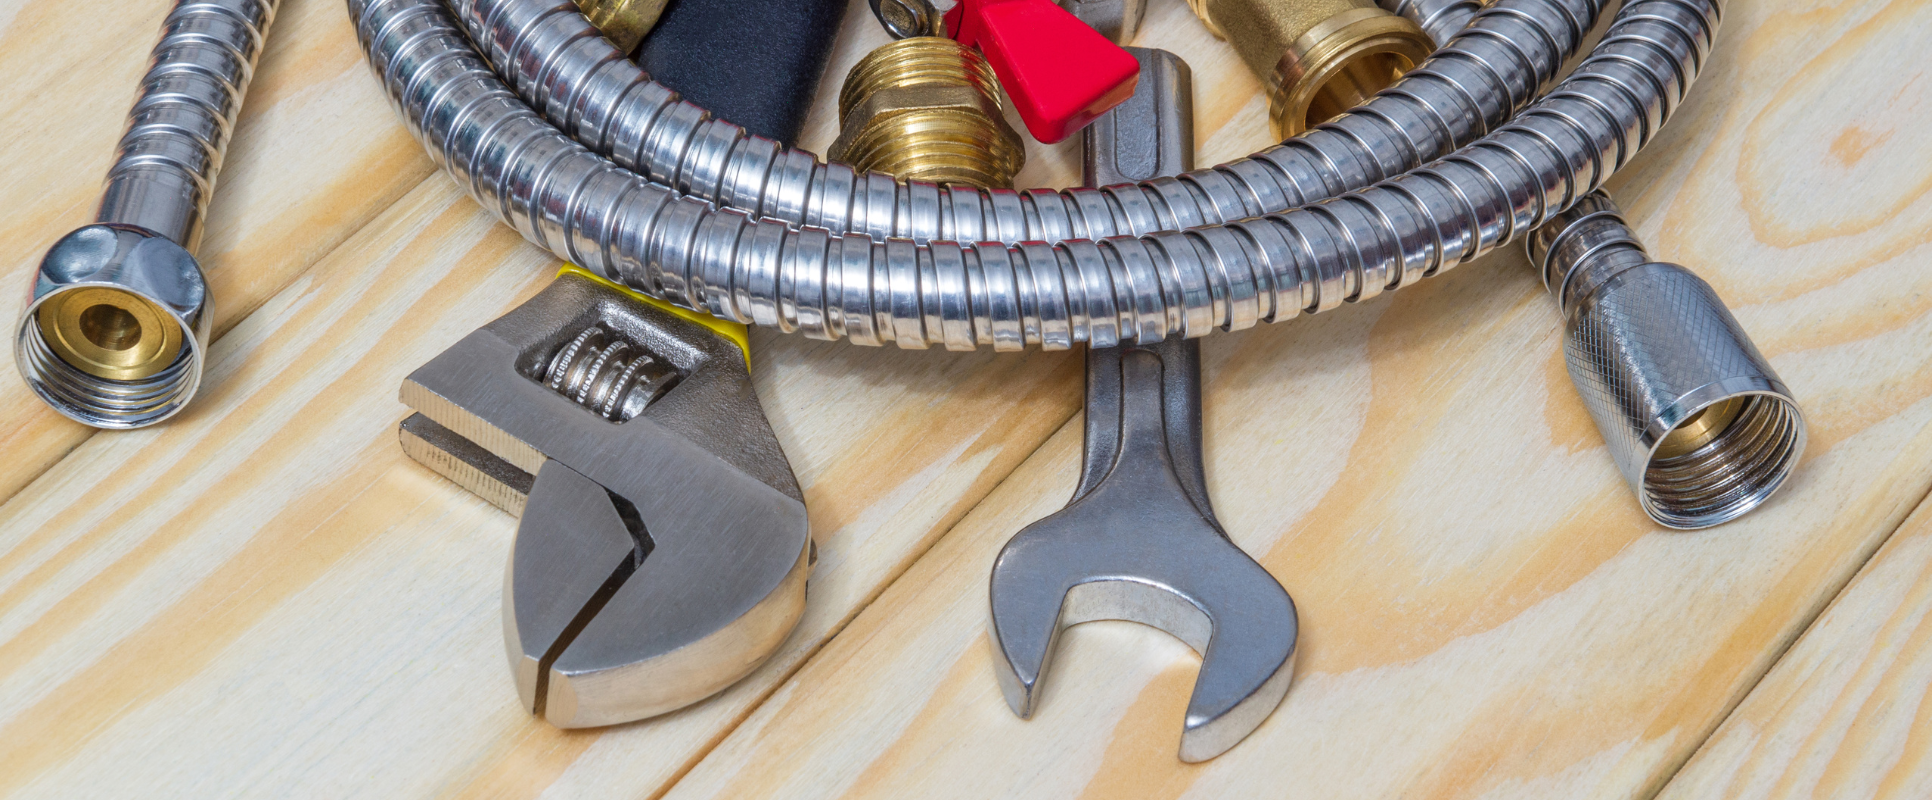
Tools Required For Fixing A Leaking Faucet
- Adjustable wrench
- Screwdrivers (flathead and Phillips)
- Pliers
- Pipe wrench
- Utility knife
- Plumber’s tape (Teflon tape)
- Replacement washers
- O-rings
- Valve seat
- Faucet cartridge or stem
- Silicone-based lubricant
- Flashlight or work light
- Pipe cutter
- Faucet key (for frost-proof faucets)
How To Repair A Dripping Outdoor Faucet?
As you have learned some of the causes of leakage, let us proceed to learn the process of repairing your leaking outdoor faucet.
Step 1: Turn Off the Water Supply:
The first step in fixing any problem should be the shutting down of the water supply for the concerned faucet. This will help in by-passing water while you work and also avoid any addition of water flow or even damage to the same.
The shut-off valve is typically located near the faucet and may be indoors for plumbing installations, depending on where the valve is installed, turn it clockwise to shut it. However, if the shut-off valve is beyond reach or cannot be found, then the main water supply to your home must be turned off.
Step 2: Assess the Faucet Type:
Outdoor faucets generally come in two types: two types of this kind of faucet are available: the old-fashioned compression valve faucet or the latest quarter-turn ball valve faucet.
- Compression Valve Faucet: This faucet has a washer that seats on the valve to push against to stop the flow of water.
- Ball Valve Faucet: This faucet uses a rotating ball inside that opens or shuts allowing the right amount of water in.
The repair method will also vary slightly depending on the faucet type, so make sure you do notice faucet types before proceeding.
Step 3: Inspect the Faucet Handle and Packing Nut:
This is expected to make working with it easier if you find that water is dripping around the handle, then the packing nut is the issue. This is usually a quick problem to solve.
More often than not, all you need to do is turn the packing nut a little with the wrench until the leak is arrested. One important thing that should be avoided in this process is excessive tightening, for this will lead to some problems with the faucet.
If the packing nut is very tight or is rotten you may have to reinstall it.
Step 4: Disassemble the Faucet:
If you want to repair a leaking outdoor faucet, you will have to dismantle the faucet.
- Remove the Handle: Learning how to fix a sink involves removing the handle by using either a screwdriver or a wrench. Depending on the design of the knife it might be possible that the screw which anchors the handle is concealed by a cap of some sort.
- Remove the Stem or Cartridge: After that you should be able to see the stem or cartridge if the handle is removed. If you have one on your lock you need to use a wrench or pliers and remove it gently. If it is immovable, one will have to spray some PP or use a rubber mallet to shock it loose.
- Inspect the Washer and Valve Seat: Inspection of the washer to discover signs of wear or problems that may need addressing will also be a good strategy. If it has cracked, got frayed or has turned hard, it will require replacement. While the stem or cartridge is removed, clean the valve seat for any sign of corrosion or damage. It if is pitted or rough it may be required to replace it or to level it using a valve seat dressing tool.
Step 5: Replace the Washer or Cartridge:
- Washer Replacement: If the washer is the problem, carry it to the hardware store of your choice and get an original washer. In the case of the washer, the size, and type may differ depending on the model of the faucet.
- Cartridge Replacement: In the case of the cartridge or stem-based faucets, you might need to replace the whole cartridge. To do this, drop the old one at the nearest hardware store and ask them to give you the one that is of similar measure.
Step 6: Reassemble the Faucet:
Now you have to bring back the faucet into its normal structure.
- Install the New Washer or Cartridge: In the correct position, install the new washer or cartridge to its proper position. If you are doing the valve seat replacement then fit the new valve seat properly.
- Reattach the Stem or Cartridge: Place back the stem or the cartridge in its rightful position and make sure that it is well fixed.
- Secure the Handle: Place the handle back to the position in the handle and screw it tightly.
Step 7: Turn On the Water Supply
After this the water supply back on once all the parts have been put back together. Turn the knob gradually to turn on the faucet to see if they have settled and healed the leaking issue. If after vigorously washing the car water still leaks on the car, then ensure that you recheck the parts you replaced were well fixed.
Choosing the Right Shower Faucet Valve

There are differences between shower valves and selecting the right replacement valve is crucial to make your new vale work as supposed to. When shopping for a replacement valve, consider the following:
- Type of Valve: Some of the existing shower valves include pressure balancing, thermostatic valves, and manual diverter valves. To ensure that you find a suitable valve for your shower, ensure that you get one that will work with your shower’s current system.
- Compatibility: Before making the purchase, you need to know the specific make or the manufacturer of the valve to be used, and whether it is a disc or a cartridge type.
- Water Flow Standards: Some of the changes may affect the water flow regulations and you may prefer a valve that comes with these changes.
- Material Quality: Choose to have a valve that is made from materials such as brass or steel; this will help to avoid having to keep replacing the valve in future due to breakage. Despite the fact that inexpensive plastic valves may appear to be good, they could not prove efficient over the long term.
How to Prevent Future Leaks
- Turn Off the Faucet Properly Always turn off the handle until it is tightly, fully off or until there is no water dripping from it. If you close it but not completely, a tiny crack is enough to let the air out, slowly.
- Inspect the Faucet Regularly Every once in a while ensure that you check your outdoor faucet for signs of wear, corrosion or if it has been damaged in any way. Realizing that there are cracks in the valve seat, or the washers have become worn out at an early stage is key to avoiding severe mishaps.
- Protect Your Faucet in Winter Homes or offices that are located in winter regions often suffer from pipe bursting due to freezing. To avoid this from happening, you need to have a frost-proof faucet or simply turn off the water and empty the faucet during winter.
- Use Water Softening Products Corrosion affects faucets in hard water areas, and mineral deposits inside faucets may cause blockage with time. This problem can be prevented by using a water softener system or descaling products in your home or workplace.
Additional Tips and Troubleshooting
- Frozen Pipe Prevention: If you have noticed leakage around the outdoor faucet that has resulted from frozen pipes, you need to cover the pipes or fit the faucet with a frost-proof faucet.
- Check for Corrosion: If corrosion is an issue affecting your faucet or valve seat, consider replacing the said faucet completely. The parts can rust and continued use may result in something more serious.
- When to Call a Professional: It means that you need to replace a washer, valve seat or cartridge, but if the leakage does not stop or if your problem is more complicated, it is better to turn to the specialist plumber. It is perhaps another time that it is rooted more into the plumbing system and only an expert will be able to tell where the problem is and how it was caused without making the situation worse.
Conclusion
That is why a leaking outdoor faucet qualifies as an issue on the manageable side of the problematic scale. Following the procedures stated in this guide along with identifying the source of the leak you can oftentimes repair the leak on your own and avoid expensive plumber’s bills. Regardless of whether the problem is a worn washer, a damaged valve seat or a loose packing nut, most of the time, the leaks can be fixed. Do that by first shutting off the water supply, ensuring you have all your tools, and then taking your time while repairing it.
If none of these works, don’t just force yourself into attempting to correct the problem because you are halfway through; consult a professional plumber who will fix the issue in the right manner.