
A dripping tap is one of the most common household annoyances. Beyond the irritating sound of constant dripping, a leaking tap can waste significant amounts of water and lead to higher utility bills over time. Fortunately, in many cases, the fix is straightforward: changing the tap washer. This small, inexpensive component plays a crucial role in sealing the tap and preventing leaks. With just a few tools and some patience, most people can replace a tap washer themselves without hiring a plumber. This guide will walk you through the process step-by-step, explain why taps leak, and offer helpful tips to ensure the tap repair job is done correctly.
Understanding the Basics: Why Taps Leak
Tap washers are small round discs, typically made of rubber, nylon, or a similar durable material. They sit inside the tap assembly and create a watertight seal when the tap is turned off. Over time, washers can wear out, crack, harden, or become misshapen due to constant pressure and repeated use. When that happens, water can escape even when the tap is closed, causing drips or a slow trickle.
In most traditional compression taps—the type you turn clockwise or anticlockwise—changing the washer usually solves the leak. Mixer taps or ceramic disc taps may use different mechanisms, but for standard taps, replacing the washer is often the most cost-effective solution.
Tools and Materials You Will Need
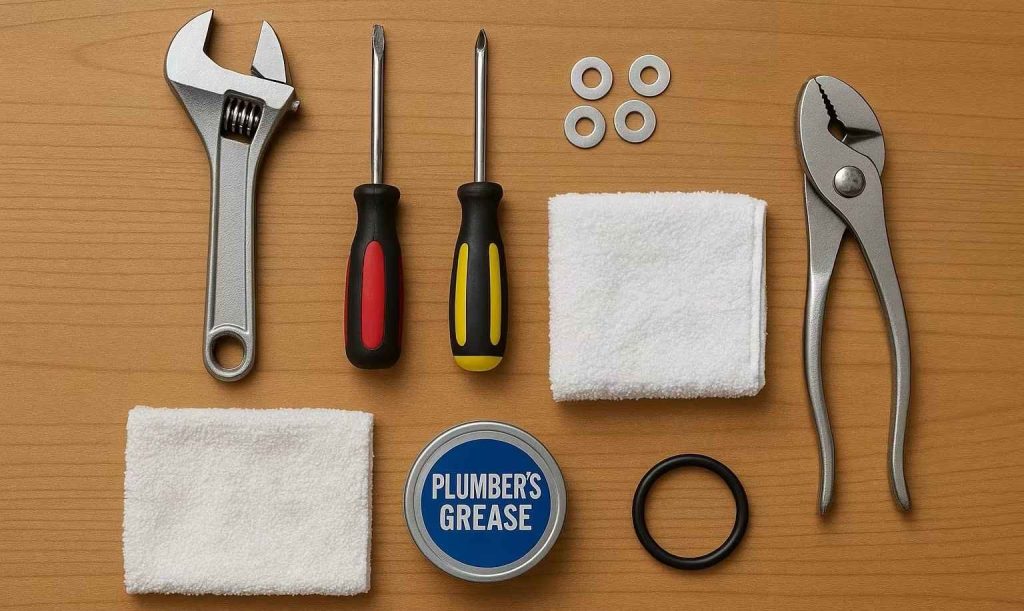
Before you begin, gather the right tools and replacement parts. Having everything ready will make the process quicker and smoother.
Tools and supplies:
- Adjustable spanner or wrench
- Flathead and Phillips screwdrivers
- Replacement washers (make sure they are the correct size)
- Cloth or rag
- Plumber’s grease (optional but helpful)
- Towels or a bowl to catch water
- O-ring (optional if needed)
- Pliers (if parts are stiff or stuck)
Step 1: Turn Off the Water Supply
Safety and cleanliness start with isolating the water flow. Most sinks have isolation valves located underneath. These can be turned off by using a screwdriver or small lever. If you cannot access isolation valves, you may need to turn off the main water supply to your home. Once the water is off, turn the tap on to release any remaining water and pressure in the system.
It’s a good idea to place a towel or bowl in the basin or work area to catch any residual drips and prevent small parts from falling down the drain.
Step 2: Remove the Tap Handle
To get to the washer, you must first remove the decorative cap or cover on the tap handle. These often show “H” for hot or “C” for cold, or they may be blank. Use a flathead screwdriver to gently prise off the cover. Underneath, you will find a screw—usually Phillips head—which holds the handle in place.
Unscrew it carefully and set the screw and cap aside. Then remove the handle by gently lifting it or wiggling it free. Some handles might need a bit of persuasion if they’ve been in place for years, but avoid using excessive force that could damage the tap.
Step 3: Access the Tap Mechanism
With the handle removed, you will see the valve mechanism or tap headgear. This is the component you must remove to reach the washer at its base. Use an adjustable spanner or wrench to loosen the headgear by turning it anticlockwise. It’s important to get a firm grip and keep the tool positioned squarely to avoid damaging the metal or slipping.
If the headgear is stuck, wrap a cloth around it to protect the surface, then use pliers or a bit of penetrating oil and try again. Once it loosens, continue unscrewing it by hand and lift it out completely.
Step 4: Identify and Replace the Washer
At the bottom of the removed mechanism, you’ll find the washer. It may be held in place by a small screw or simply pressed into a recess. Use your screwdriver or fingers to remove the old washer. Check for wear, splitting, cracks, or flattening—signs it was the cause of the leak.
Now, insert the new washer. Make sure it matches the old one in size and shape. If the washer is secured with a screw, tighten it gently without stripping the thread. Some taps also have an O-ring around the stem. If the O-ring looks worn or brittle, it’s a good time to replace it as well. A small dab of plumber’s grease on the threads or O-ring can help ensure smooth operation and a good seal.
Step 5: Reassemble the Tap
Once the new washer is in place, reinsert the tap mechanism into the body of the tap. Screw it in by hand initially to avoid cross-threading, then use your spanner to tighten it. The goal is a snug fit—not overly tight. Overtightening can damage threads and make future repairs harder.
Next, position the handle back onto the headgear and secure it with the screw you removed earlier. Snap the decorative cap back into place.
Step 6: Turn the Water Back On
With everything reassembled, turn the isolation valve or main water supply back on. Slowly open the tap and let water flow for a moment to ensure smooth operation and clear any air trapped in the system. Then turn the tap off and observe closely for any drips or leaks.
If the tap is still dripping, the washer might not be seated properly, the O-ring could be faulty, or the valve seat inside the tap may be worn and need reseating. However, in most cases, a new washer solves the problem.
Helpful Tips and Common Mistakes to Avoid
- Check before you buy: Take the old washer to a hardware store to match size and type if you’re unsure. Washers come in different diameters and materials.
- Be gentle: Metal parts can scratch or warp easily. Use cloth and appropriate tools for removal.
- Don’t forget the O-ring: Sometimes leaks persist because the O-ring is damaged. Consider replacing it while you’re inside the tap.
- Keep parts organised: Place screws and covers in a small bowl so nothing gets lost mid-repair.
When to Call a Professional
Although changing a tap washer is usually simple, not all taps are the same. If you encounter ceramic disc mechanisms, integrated taps, or severe corrosion, it may be wise to consult a plumber. Additionally, if the leak persists after washer replacement, the internal valve seat could require grinding or professional attention.
Final Thoughts
A dripping tap may seem minor, but it wastes water and can become more serious if ignored. Learning how to change a tap washer empowers you to carry out small repairs confidently, saves money on plumbers’ fees, and contributes to more sustainable water use. With the right tools, a bit of care, and the steps outlined above, most householders can complete the task in under an hour. The next time you hear a persistent drip, you’ll be ready to fix it quickly and effectively.